Prenatal Nutrition | Healthy Kids | Menopause and Diet | Foodbank Donations | Athletes and RED-S | Diabetes and Sickness | Grow Sprouts | Sprout Sandwich | Ceviche
Growing Sprouts at Home
Beth Garz, MS, RDN, ISU Alum
Learn how easily delicious and nutritious sprouts can be grown in a small space.
Involving Kids in Nutrition from the Kids Ground Up
One of the best ways to get kids to eat their veggies is to involve them in the food production process from growing to cooking and eating. Not only does growing fruit and vegetables educate kids on the food production process, it also makes them more eager to try the food they were involved in growing. Veggie gardening promotes outdoor activity, hands-on learning, sustainability, self-sufficiency, and encourages the practice of including fresh-healthy foods into their diet.
You don’t need a green thumb or a large amount of space to garden either. There are some wonderfully nutritious herbs, fruits, and vegetables that can be grown with very little space, time, cost, or effort. Perfect for getting the kids involved! You can gather the necessary materials yourself or buy kits with everything you need to start growing. Some kid-friendly options include lettuce, cherry tomatoes, basil, parsley, green beans, strawberries, and probably the easiest of all are alfalfa sprouts!
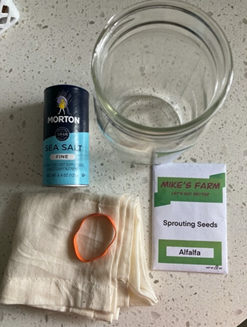
All you need for an impressive batch of alfalfa sprouts in just 4 days is a jar, cheesecloth, a sunny windowsill, and seeds. Each step is kid-friendly and relatively mess free. Here’s how to start growing from scratch!


- Glass mason jar
- Cheesecloth
- Rubber band
- Small bowl
- 2 tablespoons alfalfa sprouts
- Sea salt
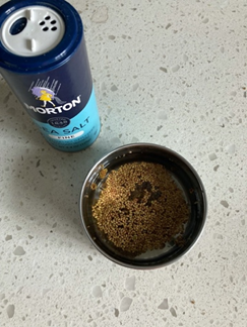
- Place seeds in a small bowl and cover with water. Add a pinch of salt to encourage your seeds to sprout. Leave them to soak for at least 6 hours.
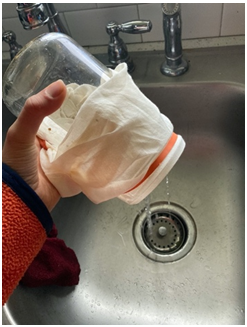
- Drain and rinse the seeds using the cheesecloth.
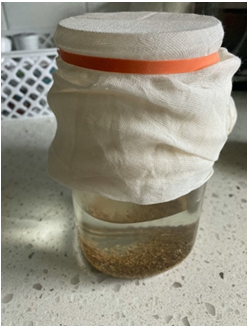
- Scrape the seeds back into the mason jar and cover with the cheesecloth, securing it with the elastic band or piece of string.
- Place the jar on its side on a windowsill so the seeds spread out. Leave the jar in the windowsill overnight.
- In the morning, pour ½ a cup of water through the cheesecloth and gently swirl around before pouring the water back out through the cheesecloth. Allow to drain completely.
- Place the jar back on its side and leave overnight. Repeat the watering and draining for four days total or until the sprouts are green and 3-5cm in length.
- Remove the sprouts from the jar and gently rinse.
- Store in a sealed container in the refrigerator for up to 4 days.

